Have you ever had your generator shut down unexpectedly, leaving you frustrated in the middle of a critical task? It could be due to a faulty low oil sensor. In this guide from Best Generator For Mobile Detailing, I will take you through the steps of replacing the low oil sensor on a generator, helping you avoid downtime and costly repairs. Let’s start by understanding why this small component plays such a pivotal role.
Understanding the Importance of the Low Oil Sensor in Your Generator
Purpose of the Low Oil Sensor
Think of the low oil sensor as the guardian of your generator’s engine. Just like a safety valve, it’s there to protect the engine when the oil levels dip dangerously low. Without it, you could risk severe engine damage from running without proper lubrication. And believe me, replacing a generator engine is no small task. By preventing the engine from overheating or locking up due to lack of oil, this sensor ensures your generator runs smoothly for years to come.
It’s easy to overlook small components like this sensor until they fail. Yet, the low oil sensor is a safeguard, cutting the power when oil levels aren’t enough to keep the engine running safely. This single action can save you from a much more expensive repair down the line.
Common Issues
What happens when the sensor itself is the problem? Generators that shut down frequently, even when oil levels are optimal, often point to a faulty sensor. You might be topping off the oil, scratching your head, wondering why the machine still refuses to stay on. In some cases, the sensor becomes overly sensitive or malfunctions, reading incorrect oil levels and shutting off the engine as a precaution.
The key here is knowing that the problem might not be with your oil levels at all but with the sensor that monitors them. This is why regular maintenance, including sensor checks, becomes critical in keeping your generator functioning without interruptions.
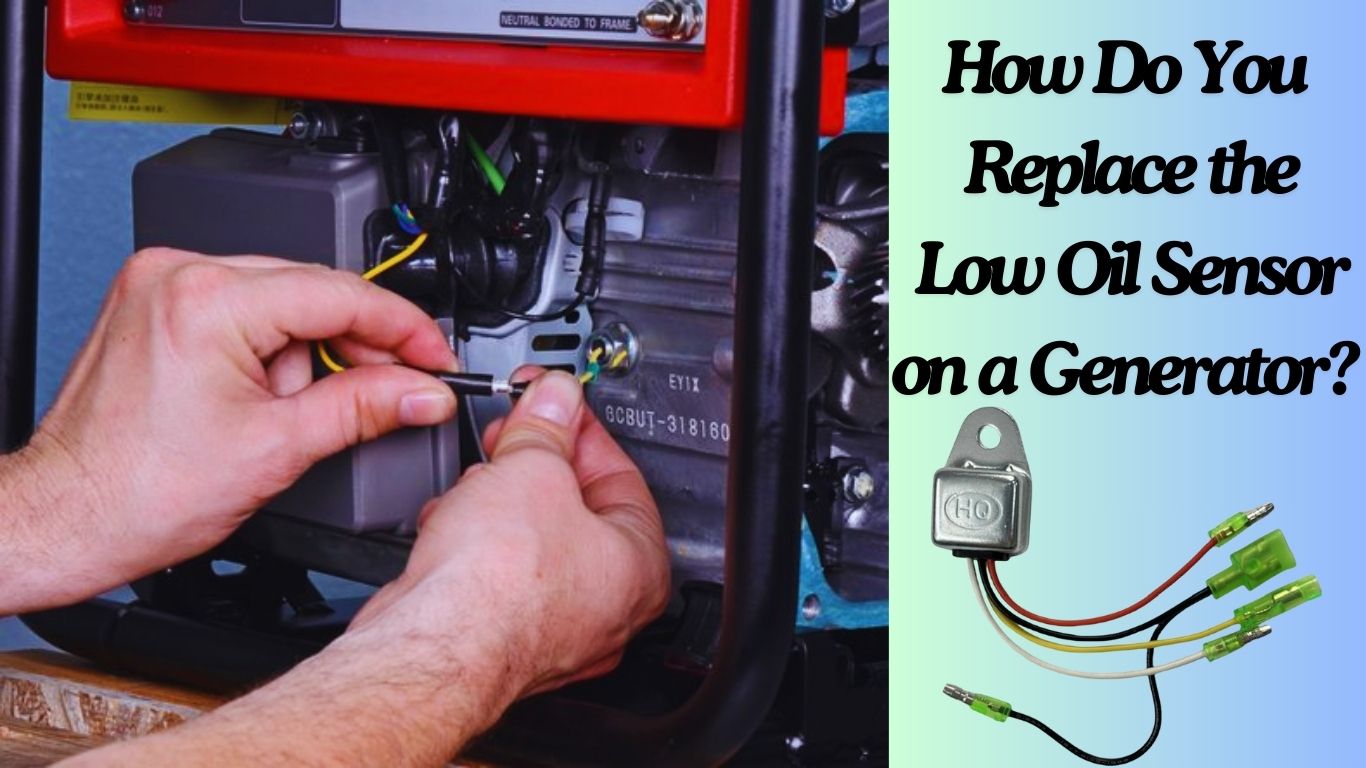
Step-by-Step Guide to Replacing the Low Oil Sensor in Your Generator
Tools You Will Need
Ready to tackle your generator repair? Here’s your essential toolkit for replacing the low oil sensor:
- Socket Wrench: Make sure you have the right size to avoid those frustrating mid-repair hiccups.
- Replacement Sensor: Grab a new one that matches your generator model for a perfect fit.
- Oil Pan and Rags: Catch any spills and clean up easily—no mess, no stress.
- Thread Sealant: Prevent leaks with this handy addition if your model requires it.
- Service Manual: This gem will guide you through parts locations and manufacturer specs, ensuring every bolt is tightened just right.
Pro Tip: Don’t skip on the details! Starting a job only to realize you’re missing a crucial tool can turn a simple repair into a headache. Be prepared, and your repair will go smoothly.
Preparing Your Generator for the Repair of the Low Oil Sensor
- Safety First: Ensure the generator is off and cool to avoid burns or electrical hazards. Disconnect the battery to prevent any unexpected electrical issues.
- Prepare for Oil Removal: Drain the oil to prevent spills and leaks when removing the old sensor.
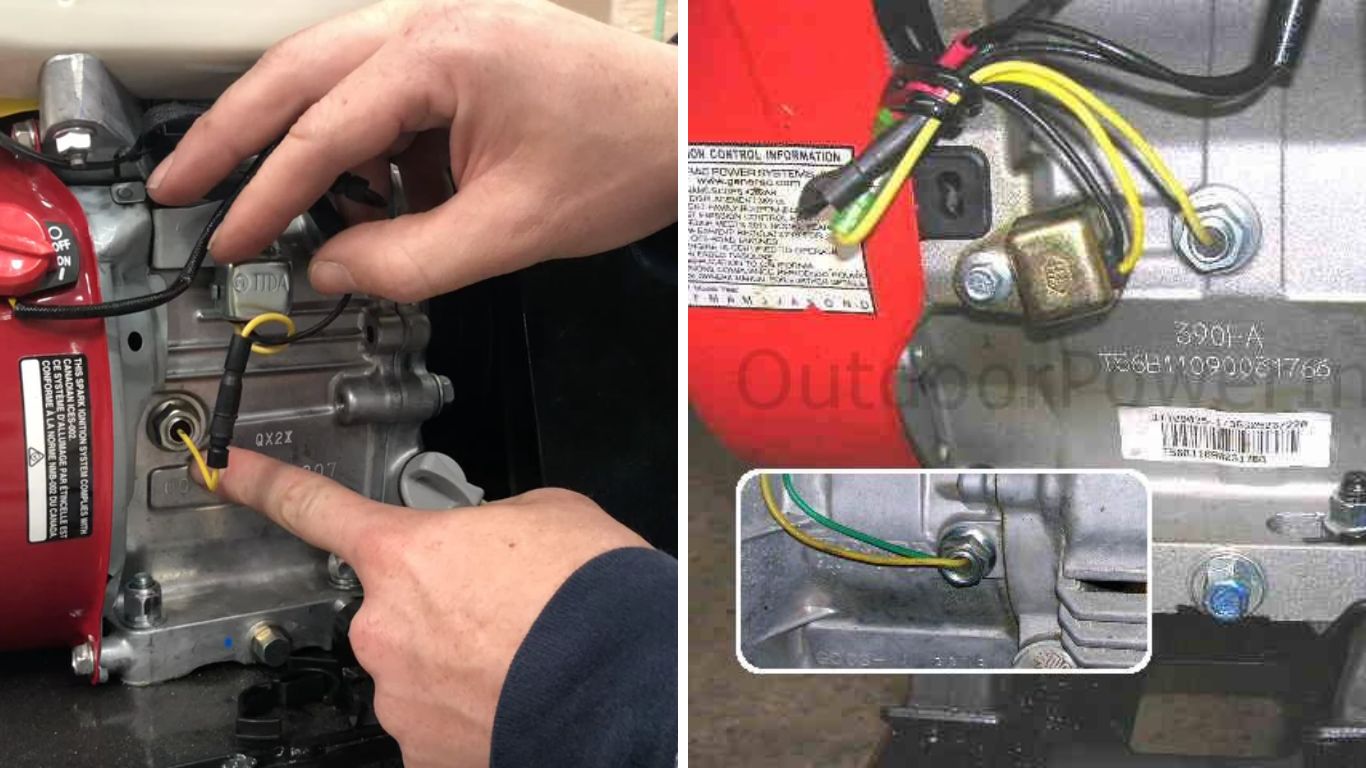
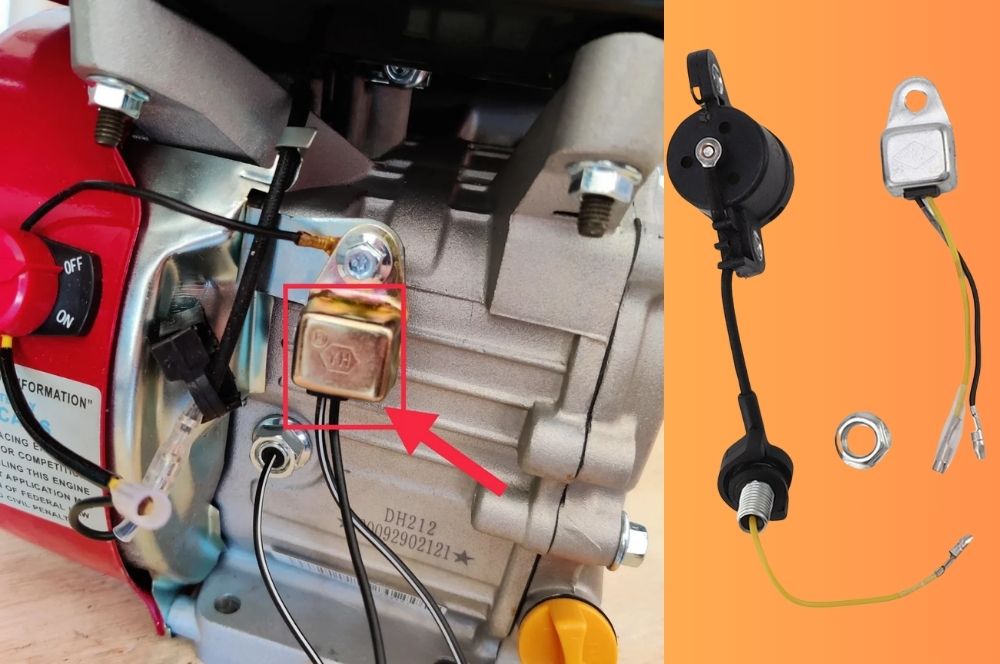
- Find the Sensor: The low oil sensor is usually located near the oil pan or at the bottom of the engine. If you’re uncertain, consult your manual to pinpoint its exact location, avoiding unnecessary searches and potential damage.
Removing the Old Sensor
- Disconnect Wiring: Carefully detach the wiring from the sensor. Note the wire connections to avoid confusion when reconnecting.
- Remove the Old Sensor: Use your socket wrench to unscrew the faulty sensor. Inspect it closely for oil buildup or worn contacts—these could be the root of the issue.
- Avoid Misdiagnosis: Sometimes, sensor problems can be mistaken for engine issues. Checking the sensor and its wiring first can prevent unnecessary repairs and save time.
Installing the New Low Oil Sensor
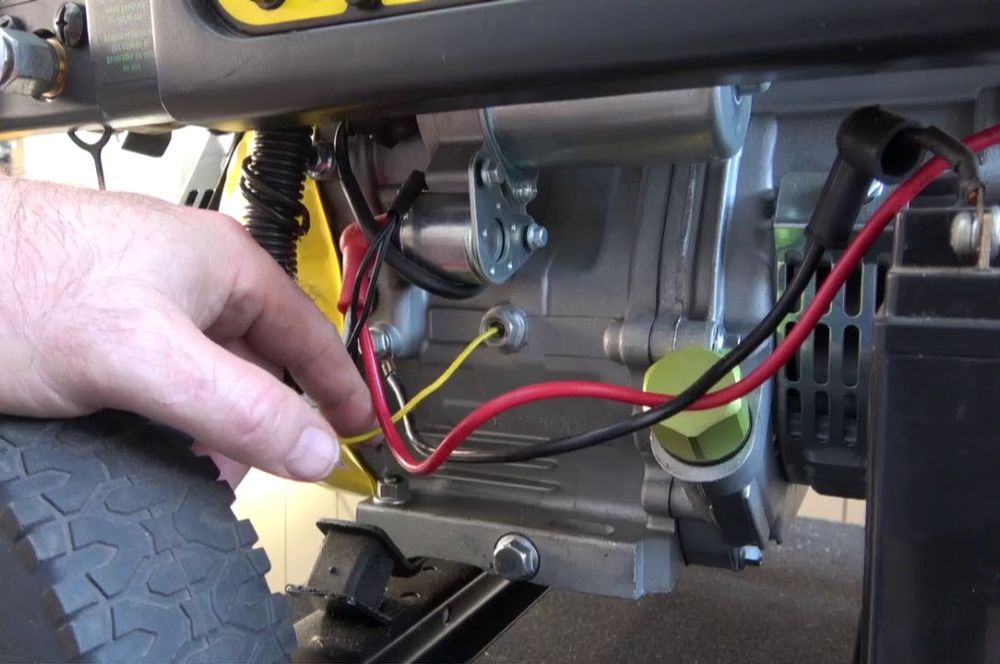
- Align the Sensor: Position the new sensor carefully, ensuring it fits perfectly with the threads. Tighten it gently to your generator’s specifications—over-tightening can damage the sensor or threads.
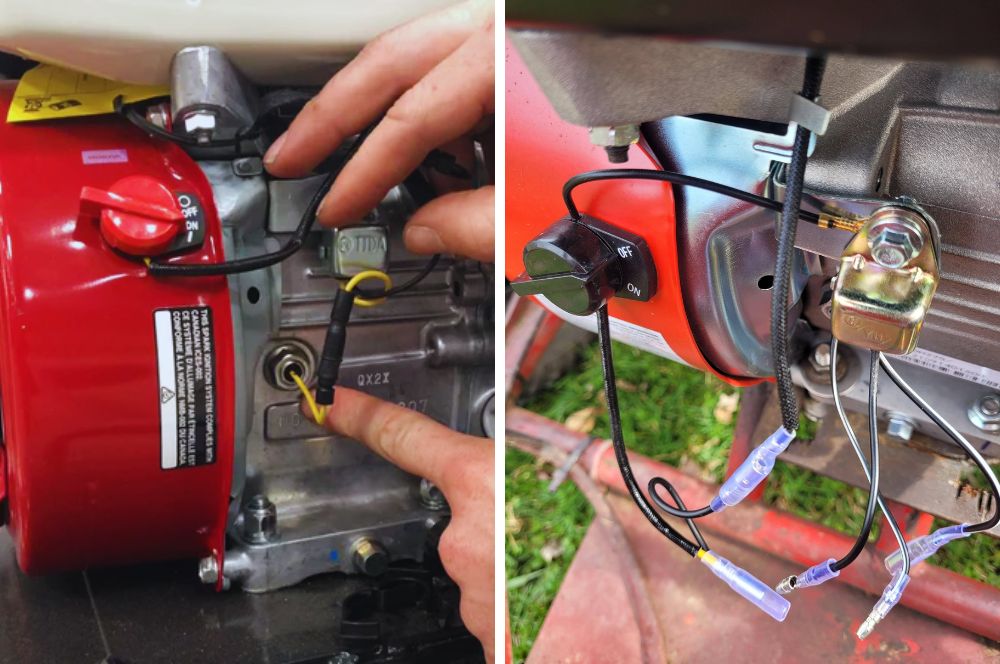
- Secure the Wiring: Connect the sensor wiring securely, making sure each connection is firm and correctly placed.
- Inspect Your Work: Before reconnecting the battery, take a moment to thoroughly review your installation. This final check helps prevent future issues and ensures your generator is ready to go.
Testing After Installation
- Refill the Oil: Begin by topping off the oil to ensure the engine has adequate lubrication.
- Reconnect the Battery: Secure the battery connections to prepare the generator for operation.
- Start the Engine: Power up the generator and observe its performance.
- Monitor for Proper Functioning: Ensure the generator runs smoothly without shutting down unexpectedly. If it remains operational without triggering low oil alerts, you’ve likely fixed the issue.
- Confirm Your Success: This final check is crucial for verifying your repair. Achieving a smoothly running generator without disruptions brings the ultimate satisfaction for any DIY enthusiast.
Troubleshooting Common Issues After Replacing the Low Oil Sensor
What If the Generator Still Shuts Off?
Even after replacing the low oil sensor, sometimes issues can persist. If your generator continues to shut off, it’s natural to feel frustrated, but don’t jump to conclusions just yet. In my experience, one of the most common causes is faulty wiring. It’s easy to overlook the importance of clean, solid connections, but loose wires can trick the sensor into shutting the generator down. I always advise retracing your steps—double-check the wiring connections you made during the installation.
Another potential culprit could be incorrect sensor installation. Did you tighten the sensor properly? Was it aligned correctly? It’s small details like these that often lead to larger headaches. And let’s not forget about deeper engine issues. Sometimes the sensor isn’t the real problem—it’s a symptom of something bigger, like an oil pump failure or engine overheating. If retracing your steps and checking connections doesn’t work, it might be time to look deeper into the generator’s engine.

Signs of Successful Installation
So, how do you know when you’ve done everything right? Well, the signs are pretty clear. For starters, the generator should run smoothly without any unexpected shutdowns. After installing the new sensor, if the engine stays on, you’re in good shape.
Another key indicator is the oil light. If the light is functioning correctly—turning on when oil is low and off when levels are sufficient—then your sensor is doing its job. This simple feedback loop is essential in keeping your generator running efficiently and preventing future issues. When both the generator runs without interruptions and the oil light works as expected, you can breathe easily, knowing your replacement was a success.
Why Is the Low Oil Sensor Important for Your Generator’s Longevity?
Preventing Engine Damage
Have you ever wondered what would happen if your generator ran out of oil while in use? The consequences could be far more severe than you might expect. The low oil sensor is the safeguard that steps in to protect your engine. Without it, running the generator with insufficient oil can lead to overheating, friction damage, and even complete engine failure. That’s the kind of damage that could leave you with no choice but to replace the entire engine—a costly and time-consuming repair.
By ensuring the low oil sensor is functional, you’re actively preventing these risks. It’s not just about keeping the generator running; it’s about preserving the engine’s longevity. Like a safety net, the sensor catches the problem before it spirals out of control, saving you from significant repairs down the line.
Cost of Neglect
Now, let’s talk numbers. Replacing an engine due to oil-related damage can set you back anywhere from $100 to over $320, depending on the generator’s model and size. That’s no small expense. In contrast, replacing the low oil sensor costs a fraction of that—typically between $10 and $50 for the part itself, plus some time spent on a straightforward installation.
So, when you think about it, the cost of maintaining or replacing the low oil sensor is minimal compared to the financial blow of neglecting this small but essential component. It’s a small investment that could save you thousands in the long run, and that’s what makes it so important to keep this sensor in top working condition.
Wrapping Up: Ensuring Your Generator Runs Smoothly
Through the article from Best Generator for Mobile Detailing, you’ll discover why replacing the low oil sensor on your generator is crucial. This small yet vital component isn’t just about resolving shutdown issues—it’s essential for safeguarding your engine from severe damage. The low oil sensor ensures your engine remains properly lubricated and prevents overheating. Ignoring this sensor could lead to costly repairs far exceeding the price of maintenance or replacement.
Regular maintenance is key to keeping your generator in top shape. This includes routine oil changes, inspecting the sensor during each service, and replacing it when necessary. By following these preventative steps, you’ll avoid unexpected breakdowns and expensive repairs. A well-maintained generator is a reliable one—something every DIY enthusiast or generator owner can appreciate.
(FAQ)
How Do I Know if My Low Oil Sensor Is Faulty?
If your generator shuts down unexpectedly or the oil light stays on despite adequate oil, your low oil sensor might be faulty. These symptoms often indicate that the sensor is malfunctioning or overly sensitive, sending incorrect shutdown signals.
Can I Disable the Low Oil Sensor Instead of Replacing It?
Disabling the low oil sensor is risky. It’s there to protect your engine from severe damage by shutting down the generator when oil levels are low. Think of it like removing a smoke detector—replacing the sensor is a safer choice than risking engine failure.
How Often Should the Low Oil Sensor Be Replaced?
In my experience, the low oil sensor doesn’t need regular replacement like oil changes but should be checked during routine maintenance. Inspect it annually, especially with heavy use, or replace it every 5–10 years to avoid bigger engine problems.
How Much Does It Cost to Replace a Low Oil Sensor?
Replacing a low oil sensor is affordable and can cost between $10 to $50 for the part. DIY replacement is straightforward if you have basic tools, but professional service typically costs $100 to $320. It’s a small investment compared to the cost of major engine repairs from neglect.
Marion Woods is an accomplished generator technology expert with over 15 years of experience, currently serving as the Chief Technology Officer at GenTech Power Solutions. She holds a Master’s degree from MIT and specializes in enhancing generator efficiency and integrating renewable energy sources. Marion is a respected author and speaker in the engineering community, dedicated to pioneering sustainable power solutions.